|
ROADKILL MAYA
If a good proportion of your life is spent texture mapping polygon meshes, then you should probably install Roadkill.
The latest version is a standalone application that can be called from Maya, 3DS Max and now Softimage XSI (link is currently dead).
Have a look at the first Roadkill example movie to get a good idea of it's usage.
If you find this software useful please tell us and provide links to example images.
You could also mirror some of our example movies. Roadkill is free software released under the GNU license.
|


Load and Save OBJ files, Live Unwrap, Live Pin and Pull, Show Polygon Stretching, Topological and Loop Edge Selection.
Roadkill 1.1 Manual by Andy Swann (please mail me if you spot any errors)
http://www.box.net/rssdownload/116822313/rk1.1-manual.zip
Roadkill workflow with Poser by English Bob
http://www.morphography.uk.vu/contact.html
http://www.morphography.uk.vu/uvmapping.html
Downloads For Windows
Maya
Update 13/06/2017
Roadkill 1.1 Tested on Maya 2017 running on Windows 10
https://www.box.com/s/sefdd1de1jal0jxdfua9
Roadkill 1.1 (RC2) PC Source Code
http://www.box.net/shared/static/gqlk7hi5ia.zip
Installation For Maya
Double click Roadkill 1_1 Install.exe and click Install.
Copy RoadKill.mel from the installation directory
C:\Program Files (x86)\Roadkill1_1
and paste into your user's Maya script folder
e.g. C:\Users\your_user_name\Documents\maya\2013-x64\scripts
RoadKill the stand alone app will now be under Start -> Programs -> Roadkill 1.1
Typing RoadKill (capital R and K!) on the command line of Maya will bring up the control box.
|
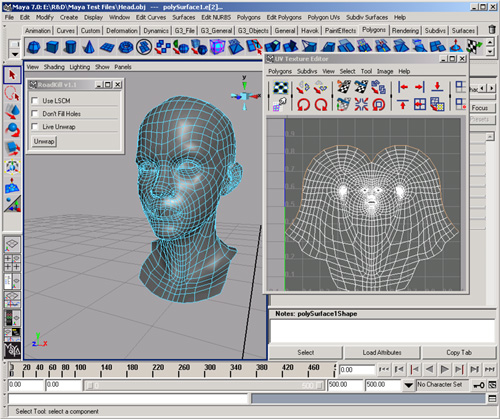
Create a UV wrap using Maya's Roadkill plugin

You need good UV unwrapping of your model for good results.
UV mapping is the technique used to 'wrap' a 2D image texture onto a 3D mesh.
If you've painted texture maps in the past,
you'll know that bad UV mapping coordinates can make the texturing process painful.
Be inspired by these incredible examples of 3D art.
It's best to start with a clean mesh.
This means your mesh has been created with all quadrangular faces, and has no extra vertices.
When you're happy with your mesh, you are ready for the next step: UV unwrapping.
I use the Roadkill professional plugin for Maya.
It automatically lays out UV co-ordinates and minimises distortion in just a few clicks.
Here's how I do it.
|
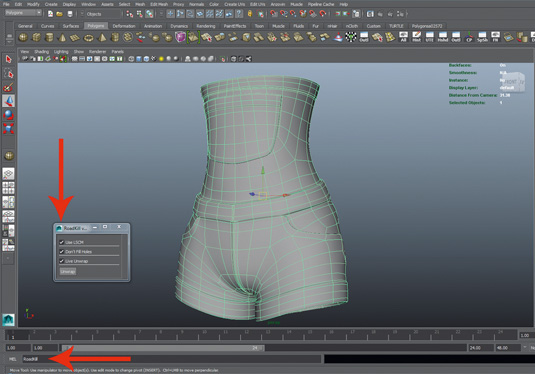
01. Run the plugin
|
Firstly you'll need to run the plugin by typing Roadkill into the Maya MEL editor, and press Enter. Now select your model and check all boxes in Roadkill then press unwrap.
|
02. Select the model
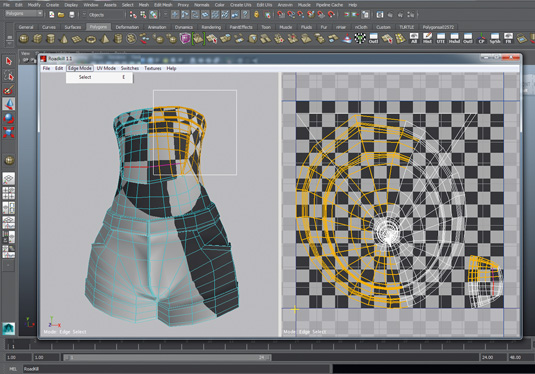
Now it's time to select the model you want your 2D image texture to wrap on to.
Press E on the keyboard, or Edge mode-Select (press E) inside Roadkill and drag-select the model to make it live.
The Roadkill interface is just like Maya, so Alt+left click will rotate, Alt+middle click will pan and Alt+right click will Zoom.
|
03. Position your seams
It is usually best to place seams where real clothing has seams (where the panels of cloth would be sewn together).
This method is more realistic and it reduces the pain of hiding seams.
If the seams are not placed in a realistic location, you will need to make sure you can paint textures in a way that the seams will not be visible.
Try to keep UV seams to a minimum and carefully choose where to place them so they are least visible to the viewer.
|
03. Cut your wrap
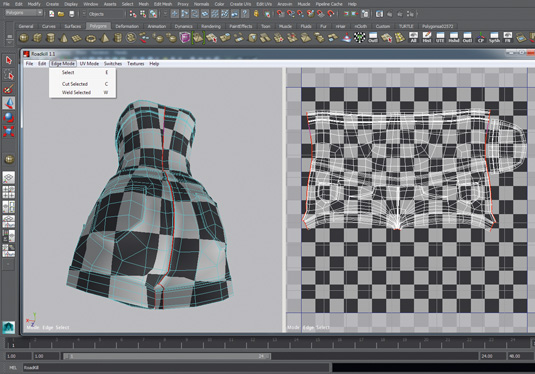
Once you decide where you want to place the seams just Shift+click to select the edges one by one or double-click the edges.
Now press C or Edge mode-Cut select for cutting edges.
If you want to be able to stitch the edges back together, select the edge and press W or have Edge mode-Weld selected.
|
04. Export the UV Map for texturing
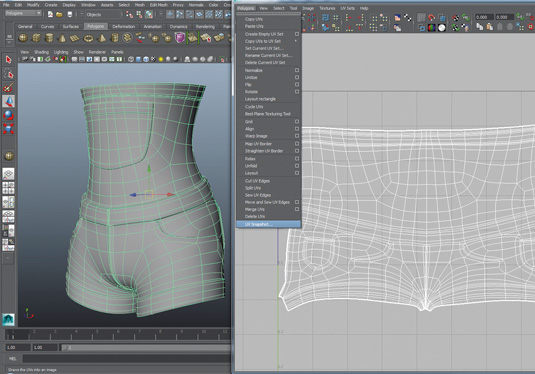
You have now finished the UV map, so exit the file (you don't even have to save it). It will now update back in Maya with its new UV.
You can then create a snapshot of this map to paint your texture map. Select Polygons>UV Snapshot and now go and have some fun painting a texture for your 3D model.
|

|
|